What is in-ear monitor for audio input?
When you use a headphone, you’re hearing the instruments of iTabla Pandit Studio Pro, but then you may not hear properly your instrument.
The solution is to use the audio input in-ear monitoring, with preferably, a headphone or earbuds. It enables you to hear at the same time:
- the sound recorded from your microphone
- the instruments from iTabla Pandit Studio Pro studio: tanpura, tabla, …
The input microphone is automatically selected:
- if an external microphone is present, it is selected,
- otherwise the internal device microphone is selected.
It’s a very nice tool to listen at tanpura and tabla accompaniment along with your instrument’s sound in your headphone, to get a nice audio feedback.
Monitoring management
It’s very easy to manage the monitoring, through two parameters:
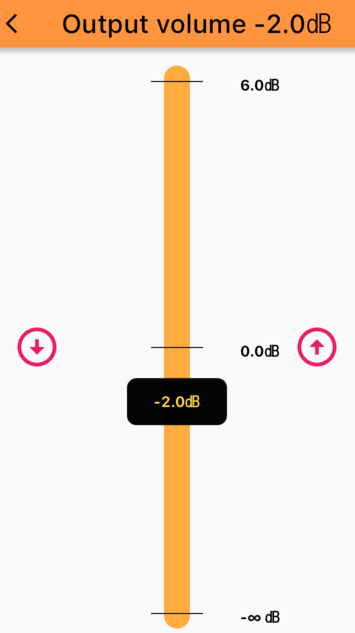
1) Output volume
The output volume defines the amplification of the audio input to the audio output. It is controlled by a slider:

Set a comfortable volume, not too loud.
A long press on this slider, without moving, will open the full page volume slider,
for easily changing it to the value of your choice:
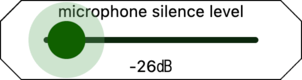
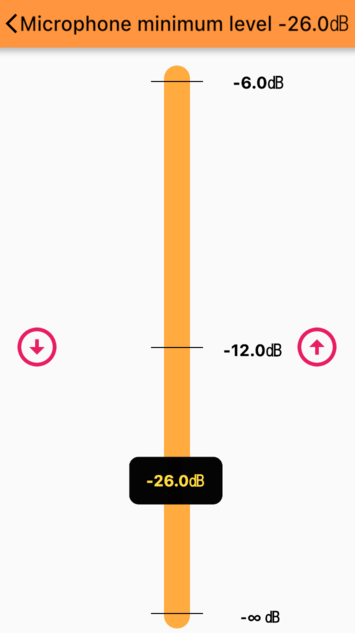
2) Microphone minimum level
The microphone minimum level defines the minimal sound volume, below which no input audio will be sent to the output. It’s equivalent to a silence level. Below level, silence is sent to the output, above level, the sound is sent to the output. This prevents to listen at unwanted noises in the output when no music is being played in the microphone.
It is controlled by a slider:
A long press on this slider, without moving, will open the full page silence level slider,
for easily changing it to the value of your choice:
A value around -30 dB is usually giving nice results. It also depends on the output volume, explained just in the previous paragraph. If the output volume is low, whatever, you’ll not head low level input noises, so the silence level can be set to -40 dB.
Audio input monitoring example
Here is an example, which works nicely:

This example uses:
- A phone
- If required, a lightning to 3.5 mm headphone jack adapter
- A Rode SC6 device, which enables you to plug at the same time one microphone along with a headphone
- A Lavalier TRRS microphone (like Rode SmartLav+, Shure Motiv MVL/A, …)
- A headphone
This is a comfortable configuration, at a very reasonable cost, and very efficient.
Of course, you may use Bluetooth earbuds or headphone, but this may add noticeable a delay between what you play and what you hear.
Take care!
⚠️ For monitoring, it’s mandatory to use a headphone, or a speaker distinct from the recording device speakers, to avoid loopback and larsen effect.
⚠️ Also, it you’re using a bluetooth speaker or headphone, it may add a delay, up to one second depending on the device, between the music you’re playing and what you’re hearing. The same can happen with a bluetooth microphone, it may add a delay before the sound reaches the software input.